**Posts contain affiliate links and I will be compensated at no extra cost to you if you make a purchase after clicking on my links.
Showing posts with label My MOM. Show all posts

Friday, May 9, 2014

Mother's Day Finishes


I finished up a couple Mother's Day gifts this week.


I found this rick rack 
 (the narrowest rick rack ever) 
 in my grandmother's sewing cabinet and wanted to incorporate it into
the apron I made for my mom.

I wish you could buy notions for 15 cents now.

I chose a watermelon fabric because my Mom grew up on a farm and my grandfather raised watermelon.
My grandfather was known for his wonderful watermelon and was called the
Watermelon King of Sumner County.


She asked me to make her an apron that crisscrossed in the back and buttoned at the shoulders
a few years ago.

I put the rick rack on the front of the pocket to give it a little of my grandma's love.

The apron is on it's way to make my momma smile for Mother's Day.


There is another special lady who will have an apron for Mother's Day.


My MIL loves to quilt, so I made her a reversible apron adorned with a few quilt blocks.


This is the reverse.  
 The fabric is by Quilting Treasures and the main fabric is called Just a Pinch
with herbs and spices all over it - perfect for an apron.

It's been an apron week, but I do have a couple quilts to show you soon...


I even have a picnic to share with you next month.


Happy Mother's Day weekend,


Saturday, May 3, 2014

A Little Wedding Help? Just asking...


Wedding plans are  really starting to come together. 
 
I need help with a couple of things and I know my blogging friends can help.
 
In case you don't know, my daughter is going to be married in October.
 
 
This quilt block was created for an outdoor flag for the wedding and was part of the Flags on a Stick blog hop back in April.  It is entered in the:


AccuQuilt Win the Dream Quilt Block Design Contest

AccuQuilt - Win the Dream Quilt Block Contest
I want I Do to Win the Dream! Vote for I Do and you can win too. Prizes are being given away daily, valued up to $700 per day just for voting!


My daughter, Trista, with her husband-to-be, Kyle, and their dog, Chief.
 
Over the Easter holiday we went wedding dress shopping and were lucky to have my mom and my son join us for the day. 
 
Me, Trista, Dress Shop Lady, and Randy
Here is a picture of the lady at the dress shop showing Trista the particulars.  My mom took the pictures and, dumb me, I never grabbed the camera to take a shot of Trista with her Grandma.  I won't make that mistake twice....wink.
 
 
Trista really wanted her grandmother and brother there to help choose a dress, but we all agreed on THE one.  It was a "no brainer" when she walked out glowing...
 
Trista and her brother, Randy
The dress will be revealed after the wedding, but I'm so moved when I see the pictures of the shopping day that I can't imagine what THE WEDDING DAY will be like.
 
So here is where I ask for help. 
 
I want to make a recipe book for my daughter (she loves to cook) and thought,
 
"How much fun would it be to have my friends from all over the world help me?"
 
I'm still trying to come up with particulars, but for those who wouldn't mind contributing a recipe by snail mail in their own hand writing I would be so happy to include it in the book.
 
I also thought about doing a linky party and maybe coming up with prizes for contributors and then I would print the posts to include in the recipe book (with permission, of course).
 
Not only recipes, but advice for a new bride could be fun, too.
 
A Virtual Bridal Shower
 
ANY IDEAS?
 
Leave me a comment. 
I think June (the traditional wedding month) would be the month for the linky party.   I've never done a linky party and think this is the perfect occasion for one.
 
If you feel like sending me a recipe card, I would love that.  Just comment and I will give you my address.
 
 
This recipe book is something she will use and cherish, so thank you for your help!


Saturday, September 21, 2013

1960's Inspiration

I've been quilting up a storm to the sounds of the 60's and watching some old movies getting ready for the "Let's Twist to the 60's with Batiks" blog hop.

My mom and I in the 60's
I was a little one in the 60's, but my mom was pretty groovy looking if you ask me.  Today, I think we would say she is a hotty.  How cool are those sunglasses?  Inspiration?

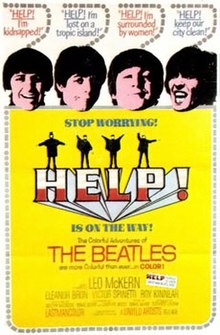
Photo - http://en.wikipedia.org/wiki/Help!_(film)

Do you ever look to music or movies for inspiration?  I have been enjoying researching and becoming very inspired by the decade of great music and social change.

 Did you know the movie, "Help!" was dedicated to the memory of Elias Howe, who in 1846 invented the sewing machine?  I was very surprised to see that!


This is one of my favorites.  There is a lot of information and great music and I've watched it about a 100 times while working on this project.  I even went and bought the sound track.


I can't share my WIP with you, but I'm very excited about this one.  My day is October 1st, so be sure and come back for a peak.  I will tell you that my arms are very sore and I don't feel rusty on my free motion quilting anymore.... Thank you, Madame Samm, for putting this blog hop together and the always wonderful, Mary, for organizing all of us.
 
Hope you find your inspiration,


Friday, July 12, 2013

Laminated Fabric - 10 Tips

Summer.  That's my excuse.  Two weeks away from my blog has me feeling a bit guilty, but I have enjoyed guests at the cabin and a few peaceful sewing days.

Mom and her bucket
My mom visited and I was able to give her the bucket she had requested when we went fabric shopping last month.  She will be able to use it as a waste basket in her sea side decorated powder room because the inside is laminated cotton fabric and will stay nice and clean.


Working with Laminated fabric was fun and not near as hard as I thought it would be.

 10 tips for sewing with laminated cotton fabric:
 
1.  Don't let the fabric store fold the fabric.  Have them roll it.  (Mine was so creased from the store)
 
2.  Pressing the fabric on the wrong side works just fine.  I used a hot, dry iron to press the WRONG side of the fabric and eventually removed all the creases from tip #1.
 
3.  Use a heavy duty needle.  I used 100/16 Jeans/Denim Needle and never had stitching issues.
 
4.  Use a walking foot.  I didn't put tape or oil on my pressure foot, I just used my walking foot through the complete project and it worked like a dream. 
 
5.  Take longer stitches.  I used a stitch length of 3.0 on my Janome and it seemed to work great.  I even back stitched with no problems.
 
6.  Do not use pins on the project unless they are in the allowance that won't be seen.  Those holes from the pins will stay...
 
7.  Fabric glue works great to hold pieces temporarily until they are sewn.  I used a drop of glue to hold the handles in place until they were stitched. 
 
8.  Clips instead of pins.  I used double pronged hair clips to hold seams together instead of pins.  (As a hairstylist, I have lots of uses for hair clips.  They work great for holding binding in place, also.)


9.  After reading other tutorials about interfacing and laminated fabric, I opted to use "sew in" interfacing instead of fusible on the laminate.  Moisture could affect the fabric and make it wrinkle and I didn't want to take a chance of ruining the fabric.

10.  This was very scary for me...   For the binding on this bucket, I needed to use the laminated fabric.  I turned my iron to a cool to warm setting (not hot..lol) and folded my 2 1/2" strip of fabric in half (wrong sides together) and pressed the outside of the fabric.  wwhhew.  It's all good.  It wasn't crisp, but it worked better than finger pressing and no melted vinyl on the iron.


Other useful sites and tutorials to help conquer laminated fabric: 
http://www.rileyblakedesigns.com/laminate-tips/

http://www.amybutlerdesign.com/pdfs/Laminated_Tips.pdf

http://www.justlaminates.com/p/sewing-tips-for-laminated-fabric.html

http://www.craftsy.com/article/tips-for-sewing-with-oil-cloth-vinyl-laminated-cotton

I loved mom's bucket enough to make one for myself for a Friday finish that I am linking up with Amanda Jean over at Crazy Mom Quilts , Sarah over at Confessions of a Fabric Addict. and Karen over at Sew Many Ways.

Fabric Buckets Lined with Laminated Cotton Fabric


The pattern is Bucket Brigade by Atkinson Designs.  These are in the Large 12" x 11" size.   Fabric in the blue bucket: laminate-Andover Fabrics, High Tide by Jane Dixon, main fabric-Moda, Cuzco by Kate Spain.  Fabric in the pink bucket: (Hobby Lobby purchase) laminate-by Brother Sister Design Studio, main fabric- Northcott, Earth Series1 by Diana Leone.


This is where my nuttiness comes from....

Mom showing one of the many uses for fabric buckets

HAPPY FRIDAY!


Saturday, June 22, 2013

Stash Building with Mom

I made the 3 hour drive to my mom's yesterday for a surprise visit for her birthday.
My Beautiful Mom
When I arrived, mom surprised me with a couple of items.  First was the Mother's Day Coupon Book she had kept all these years and then she offered me a drop of coffee in a tiny little cup. lol


There are many quilt shops where mom lives and after a nice lunch we decided to visit a couple to see what mischief we could get into.

Our first stop was Material Girls Quilt Shoppe, one of my favorites and mom had never been there, so we had to go.  Right away mom found a pattern for a fabric bucket that she liked and wants me to make for her.  (She is perfectly capable of sewing it up and probably much better than I).  But, I agreed to do it.

My mini bucket with the fabric for mom's large bucket

I made the mini bucket for practice and will make the large bucket soon for mom.  She loves the color aqua, even more than I.  The pattern is Bucket Brigade by Atkinson Designs and has 4 bucket sizes.  I honestly have not ever purchased a pattern at a quilt shop and have been very surprised how nice these instructions are.  The only patterns I have used are Simplicity, Vogue, or McCall's.  What a nice change.  A whole new world has opened up for me.

Mom was shopping for fabric for a table runner and when we went to the next shop, Picket Fence Quilt Company, not only did she find a lot of fat quarters, but she was able to purchase a very sweet runner already stitched up.


It's so much more fun shopping for fabric with someone, especially mom. We had fun shopping and giggling all day long. I found a few things to bring home with me.


I can't wait to use this black and white.  It really messes with the eyes.

My stash grew a little this week between shopping with mom and receiving a few things in the mail. (I'll post about later).

Happy Birthday, Mom.  I love you! 

If you've been following along, you know I don't have a computer right now and have been blogging with my tablet.  I'm learning, but I cheated today and used hubby's lap top.  That explains all the words tonight.  This is so much easier for me..

Trying to survive the wind,


Learning to be a Mobile Blogger


My mom is having a Birthday tomorrow and I spent the day with her yesterday to celebrate.She has had this coupon book I made for her for a few years.. ok, like 37 years.  Look how crafty I was.  My spelling was as good then as it is now.

I took her out to eat, so she has spent that one and I gave her a kiss and hug.  Be nice?  What was I thinking?

I am still working on tablet blogging, but this post happened accidentally by me uploading this collage accidentally.  I am in the process of posting about yesterday's trip to mom's.

Stay tuned. *wink,wink*

Carla

Monday, August 20, 2012

Chocolate Bird Nests aka Unbaked Cookies

My favorite cookie out of my mom's kitchen are these unbaked cookies.  Most unbaked cookies call for peanut butter but these are way more chocolaty.  (is that a word?)  I haven't met a no bake cookie I don't like.

Unbaked Chocolate Cookies


These cookies are called Bird Nests I suppose because they can be made to look like a little bird nest and you could put jelly beans in them for Easter.  I like to just plop a spoonful on waxed paper and let it set up and devour with a glass of milk.


Unbaked Cookies (Bird Nest)

3     C quick oats
1     C coconut
1/2  C chopped nuts (I use pecans)
1/2  C cocoa
2     C sugar
1/2  C milk
1/2  C butter
1      t vanilla

Combine oats, coconut, nuts, and cocoa.  Set aside.  In a large sauce pan, mix sugar, milk, and butter.  Heat in pan until mixture boils.  Boil and cook for 1 minute.  Remove from heat and stir in vanilla.  Stir dry ingredient mixture into cooked ingredients.  Drop by spoonfuls onto wax paper and let stand for 1 hour or until set.

These really are very good,
(even though my picture looks like little turds)  lol

Friday, June 1, 2012

Sewing Room

I've been a little busy lately and have not been on the blog scene.  The reason....MY NEW SEWING ROOM!! 
My mom made this Raggedy Ann wood plaque for my room when I was little
Here is a little tour of my new project room.  I have more to do to make it the room of my dreams, but I have already enjoyed sewing and chillaxin' in my very own diva attic!

We started with wood studded walls above the garage and an old work bench (which is wonderful storage).  My husband worked on heating and cooling and sheet rock.  He installed a wood floor which was obtained from some very nice people down the road that were installing new...FREE!

Heat and cooling unit.  Love climate control.

Sheet rock in progress.  This is the north wall before.

More sheet rock in progress.  This is the south wall and work bench.
Recycled wood floor installed, but what a mess.  Check out the plug ins going in above the bench..oh yeah.
After the floor and sheet rock were finished, a very nice fireman/part-time construction contractor came in and put texture on the walls.  Finally, it was my turn to get to work...  I decided to paint the room white until I can make up my mind what color I want.  Actually, I may just go crazy with accessories and leave it white.  Work in progress...always.

Here is a tour of the after:

South wall finished. 
 This is the only picture I have of the light fixtures.  The ceiling isn't high enough for the chandelier I wanted, so flush mount it was. ha  The hardware store had two fixtures on clearance.  BARGAIN!
Work benches.
 I decided to paint the inside of the benches.  I may eventually put a curtain up to hide the clutter, but for now it's good.
Lots of storage!!

Curtain.  The first sewing project in the diva attic..
I made valences for the windows using fabric by Moda - Half Moon Modern - Aqua Scissors.  Perfect fabric for a sewing room :) .

Glass front for fabric storage.  Small hanger area for work in progress.
 These cabinets are actually closet organizers.  I wanted a glass front cabinet and have been searching for something VERY affordable.  I found these at Menard's and just love them.  The hubby cut the hanging bar down a little to make it fit just right.

My new sewing table.
 My new sewing table was the splurge.  It is a Horn #5580.  It is elevated and has an air lift. (I opted out of electric lift..)  I love that it is the perfect height for me and is a great cutting table.  I found the drafting chair at Hobby Lobby and was able to use that trusty little 40 percent off coupon.  It was a steal of a deal.
Drafting chair and storage in sewing table.
I did get an insert to fit around my machine after I took this picture.  My machine now sits flush with the table.  I love that feature.  Quilting is so much easier.
Sewing table as cutting table.  Love it!

My Grandma's sewing cabinet.  My old Kenmore on top.
 I am lucky to have my Grandma Haskin's sewing machine and cabinet.  I've never tried the machine inside the cabinet, but she used it all the time and I'm sure it's a good back up.  My poor Kenmore sits on top.  I know the Kenmore works and comes in handy for those industrial strength jobs.  The thread holder on the wall came from my Grandma Wycoff.  There are  big spools on the holder that show prices of 18 cents.  You sure can't buy thread for that anymore.....

My sewing center.


North wall finished.


Quilts I made for the kids.
My husband's Grandpa made this shelf out of old thread spools. 
 This shelf is so cool for the sewing room.  It holds a little thread right now until I get my spool holders put up.  My husband does metal art.  Check out Duck Creek Designs to see some of his creations.   My name 'cut out' was one of his first practice projects.
Future home of the sink.
I planned to have a sink here by now, but I can't make up my mind what kind of cabinet I want.  I want a deep sink and not a vanity sink.  The hole in the floor is where the drain goes.  My husband is a plumber so that comes with perks...  LOL
The DIVA ATTIC.

So now you know what I've been up to.  I have some projects and stories to put on here also.

Lots more to come,


I'm linking up with:


Funky Junk's Saturday Nite Special


Days of Chalk and Chocolate

shabby creek cottage

Photobucket


 Creations by Kara
 

The 36th AVENUE


Pinning on Pinterest Party