**Posts contain affiliate links and I will be compensated at no extra cost to you if you make a purchase after clicking on my links.
Showing posts with label Craft Projects. Show all posts

Saturday, February 5, 2022

Crayon Drawstring Bag for a Certain Little Valentine

I have a fun project to share today.

I'm over on the Thermoweb blog with a free pattern to craft a 
Crayon Drawstring Bag.

My little granddaughter loves to color so I made her a little bag of coloring books and crayons.


 This drawstring bag is the perfect size for a couple of coloring books and all the crayons too. 


 HeatnBond Medium Weight Non-Woven Fusible Interfacing keeps the bag in shape and you can add HeatnBond Liquid Vinyl Gel Coating to the lining to prevent stains and make cleaning a breeze.  Of course, the pattern calls for HeatnBond EZ Print Lite to make the applique crayon tops so much easier.

Click here to get the free tutorial and pattern over at Thermoweb!

Happy Stitching!


Thursday, November 26, 2020

Happy Thankgiving!

 Happy Thanksgiving!


Thanksgiving craft inspired by "Thanksgiving Activities for Children"

Today I am grateful for all the goodness in my life even in 2020.

Here's to happiness ahead!

Stay home and stay safe!


Monday, March 14, 2016

AKA - The Bunny House Lady

Somehow I've become known as the Bunny house Lady.


I make one miniature house, which leads to another and another and another.  Well, you get the picture.

I finished up these two today.


Each has it's own family of bunnies and a complete set of furniture.


The pattern I use (modified a little) is McCall's pattern 8346 from 1982.


They make the sweetest gifts for little ones at Easter.
I can't make enough of them. 
 Trouble is, they are super labor intensive and take so much time...

and I want to make a quilt.  wink**


These little guys have to say goodbye to each other.  
Bunny BFFs forever!!

Here are houses from the past.

All of them are being loved by little hands, except the Halloween one.  (I'm trying to keep at least one in case I have little hands around here someday)

Here is where I blogged my first one.


It has black cats instead of bunnies.


And my finishes today make 7 so far. 
 I'm sure there will be more in the future (I have lots more orders), but I need to catch up on all the BOMs and quilt alongs.

Oh, and there is the last challenge for Season 7 of Project Quilting this week.


Sunday, March 6, 2016

Little Pink House - Project Quilting Season 7 Challenge 5

The Challenge:  Through the Eyes of a Child


Kim at Persimon Dreams hosts Project Quilting.
She announces a challenge and you have one week (due by noon TODAY- central time) to create something quilty.
This is the fifth challenge of six for Season 7 of Project Quilting.


The Rules:

  1.  Your inspiration for this week's challenge is children's art.  Be sure to include a picture of the art that inspired you.
(Luckily we could use one of the examples from the challenge page)


I used Capri's (Kim's daughter's) art as my inspiration. 
  Isn't it cute? 
My first thought when I read the challenge was a house and stick people, Capri is a little more accomplished than that.

2.  Every challenge piece must be a FINISHED project seen through from INCEPTION to COMPLETION during the challenge timeline. Each piece must stand alone as DONE to count toward prizes. 

3.  Your project does not need to be a traditional quilt, but must meet at least one of these requirements:

Include patchwork
Include appliqué.
Have 3 layers stitched together by hand or machine.

4.  Please remember that these projects need to be created during the week of the challenge

5. Link up either a blog post or flickr image  by Sunday, March 6th, 2016, at noon, CDT 


While Capri chose a winter scene, I took the Spring route.  Snowmen go to snow as flowers go to bunnies.....  At least in my mind.

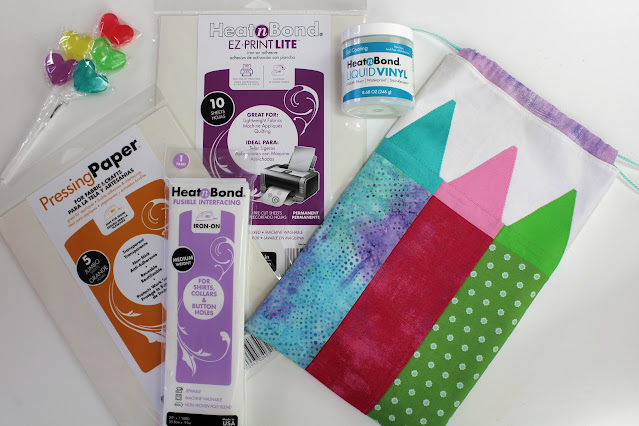
I decided to go the nontraditional route for this challenge and make a toy instead of a quilt.

The pattern I used (modified a little) is McCall's pattern 8346 from 1982.

I couldn't wait to put the Tula Pink fabric on the roof of this house. 
 I thought it looked like a tile roof.

The house is sandwiched with batting and plastic canvas.

Shall we knock on the door to see inside?  lol


The bunny isn't dressed, but he has invited us in...

I still have a bed to make and want to add a momma and baby bunny.

Here is the back of the house.
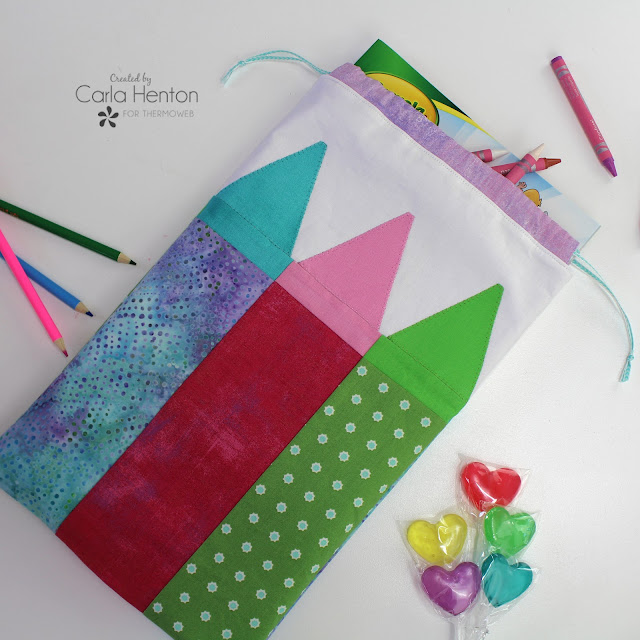
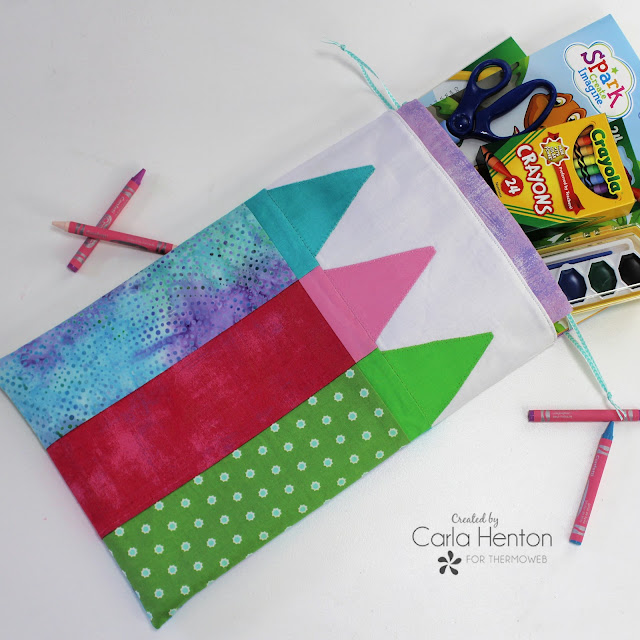


Little Pink House

Project Quilting Season 7, Challenge 5- Though the Eyes of a Child
Made by Carla in Dodge City, Kansas
Size: 10" tall and 13" wide
Freemotion quilting on the door
Techniques:  house building, bunny making, furniture making, embroidery, soooo much hand sewing, and applique


Vote by clicking HERE for your favorite Challenge 5 Projects.
My little pink house is #27.

Spring is coming....


Better get ready for Easter.


Thursday, April 17, 2014

Bunny House Lane

Two little ones are going to have a sweet Easter surprise.
I've finished 2 bunny houses, 2 sets of furniture, and 6 bunnies and all are in their new homes
ready to be loved by little people.
 
 
Welcome to Bunny House Lane.
 
 
Two houses made to look like our cabin.
One with brown bunnies and one with white.
One is for a little boy and one for a little girl.
 
 
Orange furniture in one.
 
 
Red furniture in the other.
 
 
I just love those pictures of families walking away from the camera.


Two little houses made with a few modifications from McCall's pattern 8346 from 1982.
These are the second and third ones I have made.
The first one was blogged here.
 
You may tire of seeing these little houses as I have orders for a lot more.
 
I have a ton of ideas for colors and animals
and enough orders to use them all.
 
 
I'm happy to have these finished in time for my Easter deadline.
Doing a happy dance.
 
There is a blog hop going right now where bloggers are revealing superpowers.
 
 I'm not in this one (that Easter deadline), but I've been cheering everyone on
and enjoying all the inspiration.


Sunday, November 3, 2013

Fall Crafting with DIY Wreaths

Yesterday was beautiful.  Not only for the weather, but our daughter spent the day with us.  We did everything from walking the dogs, riding the four wheeler, and shopping to CRAFTING. 

Before I share our crafty creations, I want to show off this bag that came to me in the mail.  My beautiful friend Jennifer over at Glinda Quilts made this pants bag for my daughter.  How lucky am I?  Jennifer is one of the most giving quilters I know and she is showering the world with her pants bags.  I'm lucky enough to have two pants bags in the family now.   If you wonder what a pants bag is, Jennifer says, "Pants Bags is the name I call these drawstring bags as I use them when I travel - I don't like to put my drawers in other people's drawers, so to speak!" I'm working on returning her kindness with a surprise, but that will have to wait...  (Oh, the suspense)

Burlap wreath with felt roses

We crafted fall wreaths yesterday.  This is my fall burlap wreath.  I made a Christmas burlap wreath last year and liked it enough to make another.

Burlap wreaths are so simple to make.  This one was made with a roll of wide burlap ribbon and a wire wreath.  Just wrap the burlap around the wreath, weaving it through the top and bottom wires.  I attach the burlap in the back with wire because it may come loose in southwest Kansas wind.

The felt roses are made by cutting a piece of felt into 3 equal sized strips.  Fold and glue the cut edges to the center and roll it up by twisting it slightly into a rose shape while hot gluing it as your roll.  Then just glue the roses on and attach a little string or ribbon bow.  I added a few pine cones to this one, also.


My daughter purchased a vine wreath, silk flowers, little pumpkins, and  leaves.  She hot glued them to the wreath, presto, a fall wreath for her house is made.  Isn't she a beauty?  My daughter and the wreath.

You just can't beat family time. 


Linking up with: Sew Darn Crafty
stitch by stitch

Monday, October 21, 2013

Breaking out the Wicked

Halloween will be here soon and we've been getting ready for visitors.


Creepy Lace Spider
A friend had purchased a spider at Pier 1 and it was so cute, I replicated it.  If you would like a spider like this one, glue Styrofoam balls together (one smaller than the other), wrap with lace, and give him 8 pipe cleaner legs.  (I cut 4 in half).  Daddy long legs would require full length pipe cleaners.

A very wicked blog hop starts tomorrow that was created by Madame Samm and organized by Wendy. I will be participating on Wednesday, the 23rd of October, so be sure and come back to see what other wickedness is hiding at my mouse house.  I had a little help with this project and you are going to vant to check it out.

Treats are sure to be found by visiting all of these blogs. 
 
Tuesday, October 22nd

Wednesday, October 23rd

Thursday, October 24th

Friday, October 25th

Monday, October 28th
I Piece 2-Mary
Tuesday, October 29th


Wednesday, October 30th

Thursday, October 31st
 
You vill not vant to be alone...HAHahaha