Kim is taking 52 weeks of 2014 to explore the thought of twisting traditional blocks into other images and is having a quilt along for others to join her.
Today I am presenting my twist on the traditional Maple Leaf block
as the guest designer for block 11 of the quilt along.
Kim even did a little mini interview with me and you can read it at
Persimon Dreams.
Here is the tutorial to make:
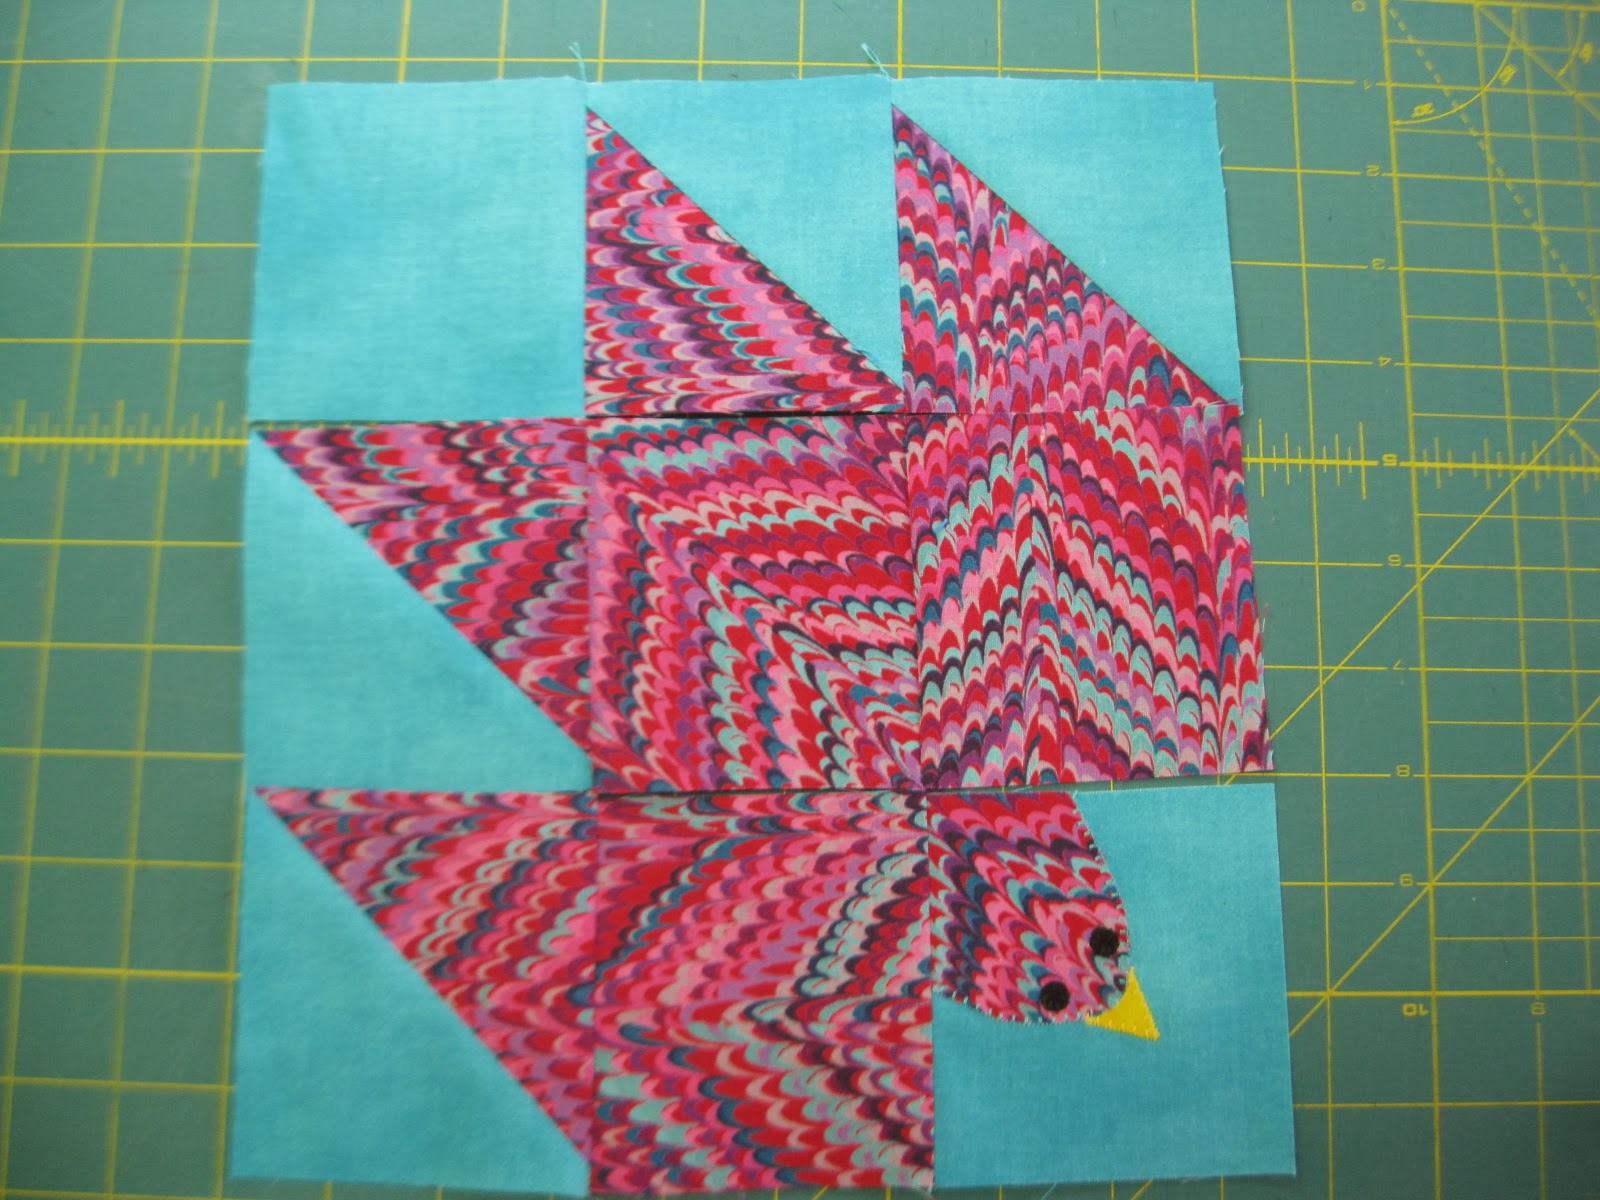
The Flying Leaf Block
Pattern by Carla at
Creatin' in the Sticks
This block is 9 1/2” or
Finished it is 9”
Use
1/4” seams throughout.
A twist on the traditional Maple Leaf
block.
Step 1: Cutting
From background fabric cut 2 - 4" squares and 2 - 3 1/2" squares.
From bird (feathers) fabric cut 2 - 4" squares and 3 - 3 1/2" squares.
You will also need a small scrap of the bird (feather) fabric for the head, a small scrap of black fabric for the eyes, and a small scrap of yellow fabric for the beak.
Step 2: Half Square Triangles
We will be using the 4" squares for this. Put one of each color right sides together. You have 2 pairs.
Now draw a line from one corner to another on the back side of the lighter fabric as in the picture.
Sew 1/4" seams on each side of the line you drew on both sets of pairs.
Cut on the line that you drew and you have 4 sets of half square triangles.
Press the seams and then you will have to square your blocks up to 3 1/2".
Lay all 9 squares out like this. You have a Maple Leaf with out a stem.
Step 3: Making the bird's head
Following the manufacturers directions, adhere fusible web to the back of fabric for the head, eyes, and beak. I use Wonder Under, but any fusible will work for this. You can use the templates in the
PDF version of this pattern, OR...
You can improvise and use the shape of a tablespoon for the head (just lay in on the corner of a piece of paper and trace around it), a hole punch for the eyes, and cut a small triangle for the beak. I did both and the improvised version looks just like the pattern version.
Which ever method you use to make templates, trace around them on the paper side of the fused fabric and cut them out.
Lay the pieces on a 3 1/2" background square using the picture as a guide. Fuse the pieces in place following the manufacturers directions.
This is what it will look like.
Now, sew around the head, eyes, and beak. I used a blanket stitch
and matching thread.
Step 4: Sew it all together
Stitch the squares together. I sewed the horizontal rows together first and then sewed the vertical rows.
Your block should be 9 1/2" square.
If you want to download the templates, this whole tutorial plus the templates are available HERE in PDF format.
I had so much fun with the first block I made two of the multi colored birds, then I made a yellow one and added borders to it so I could make an Easter treat bag for someone special.
I used the Flying Leaf Block pattern and added 2" borders all around. Then I headed over to
Glinda Quilts and used her
pants bag tutorial to make the drawstring bag. That's 2 pants bags in one week. The other one was for the
Think Ruffles Blog Hop. I'm starting to think I'm helping Jen with her mission to take over the world with pants bags. It's a great and easy to follow tutorial.
I can't wait to see all The Flying Leaf Blocks and the other blocks of the 52 Blocks Quilt along.
Thank you, Kim, for allowing me to design a block and thank you to all that have visited my blog!
My ruffle giveaway is open until Sunday, March 16th.