**Posts contain affiliate links and I will be compensated at no extra cost to you if you make a purchase after clicking on my links.
Showing posts with label Wall Hangings. Show all posts

Wednesday, November 16, 2022

Violin Collage - Quilt the Music!

  Welcome to Creatin' in the Sticks 
and 
my day - the final day for the Music Blog Hop.

To all that participated or commented -
Thank you so much!

My head is swimming with all kinds of music
and
stitching ideas I can't wait to try.

But first, it's my day to show my
Violin Collage Quilt.


Dedicated to my daughter.


This was a year ago when she was about ready to have our grandson.
She can play about any instrument, but has a passion for her violin.
I love that I can still go to see her play.


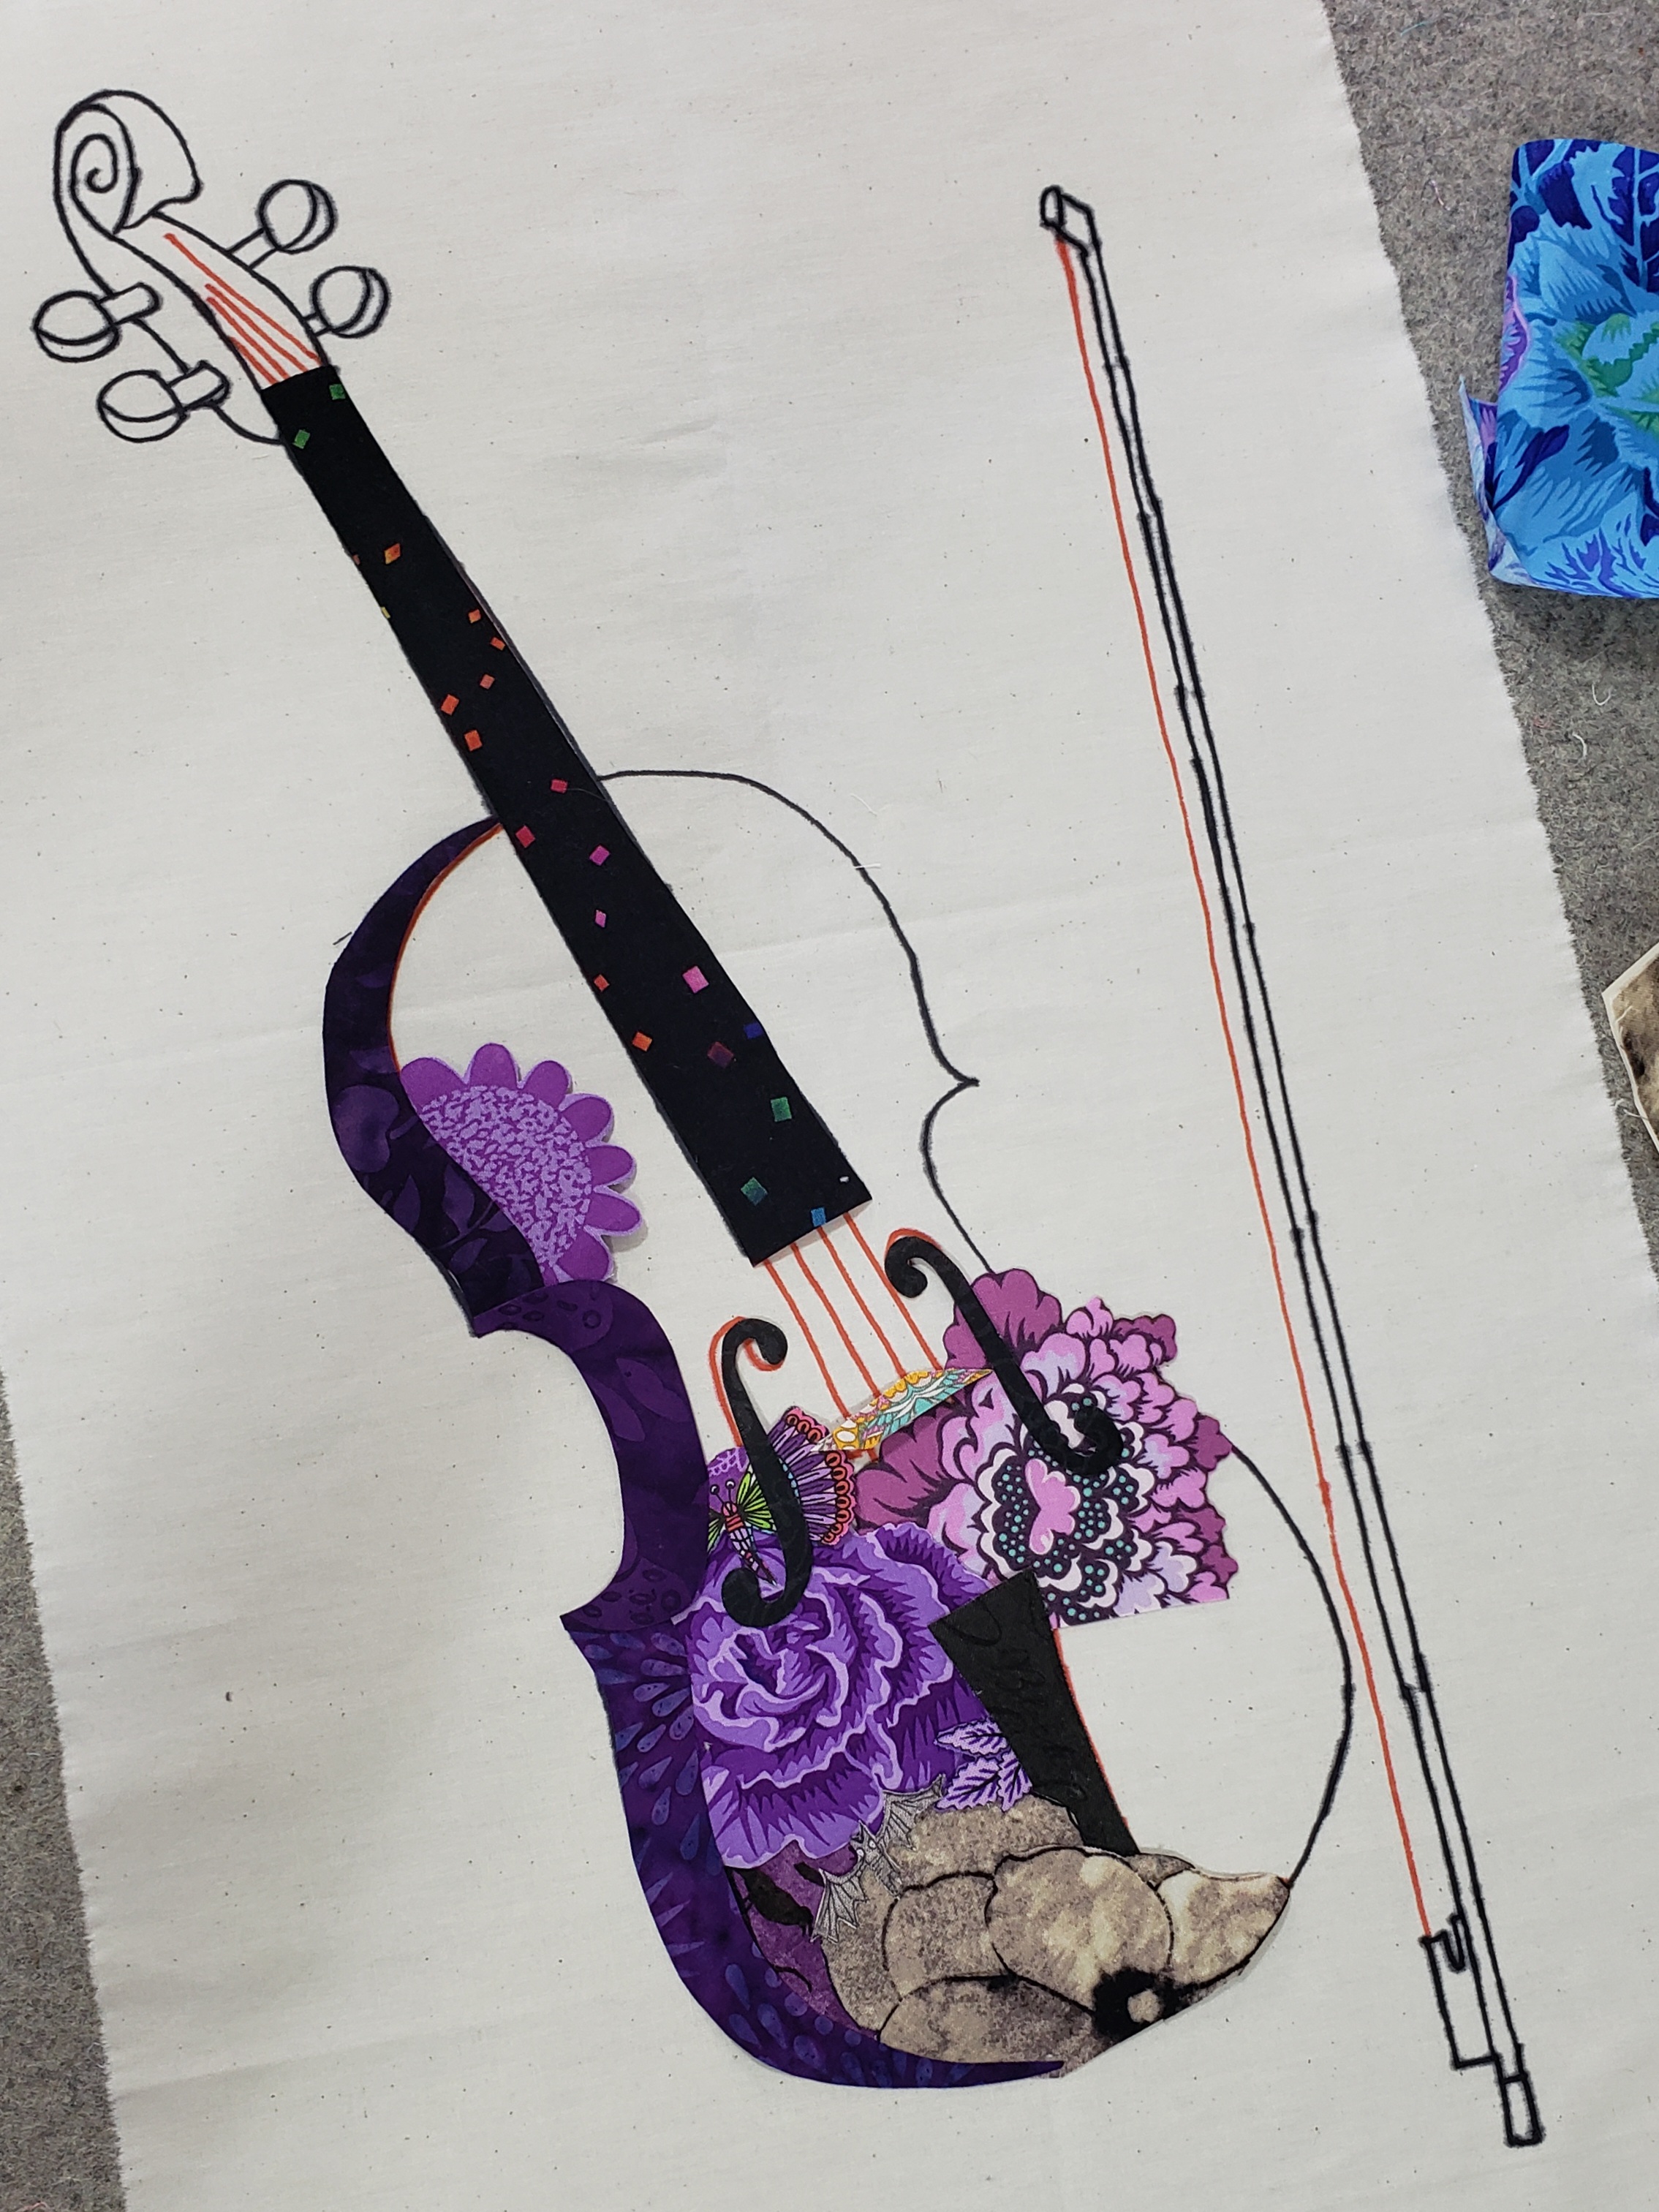
I love to make collage quilts.
To start with a drawing and add fabrics to add shadows and highlights with the fabrics.
In the meantime adding little bits for character.
Here is the violin coming to life...


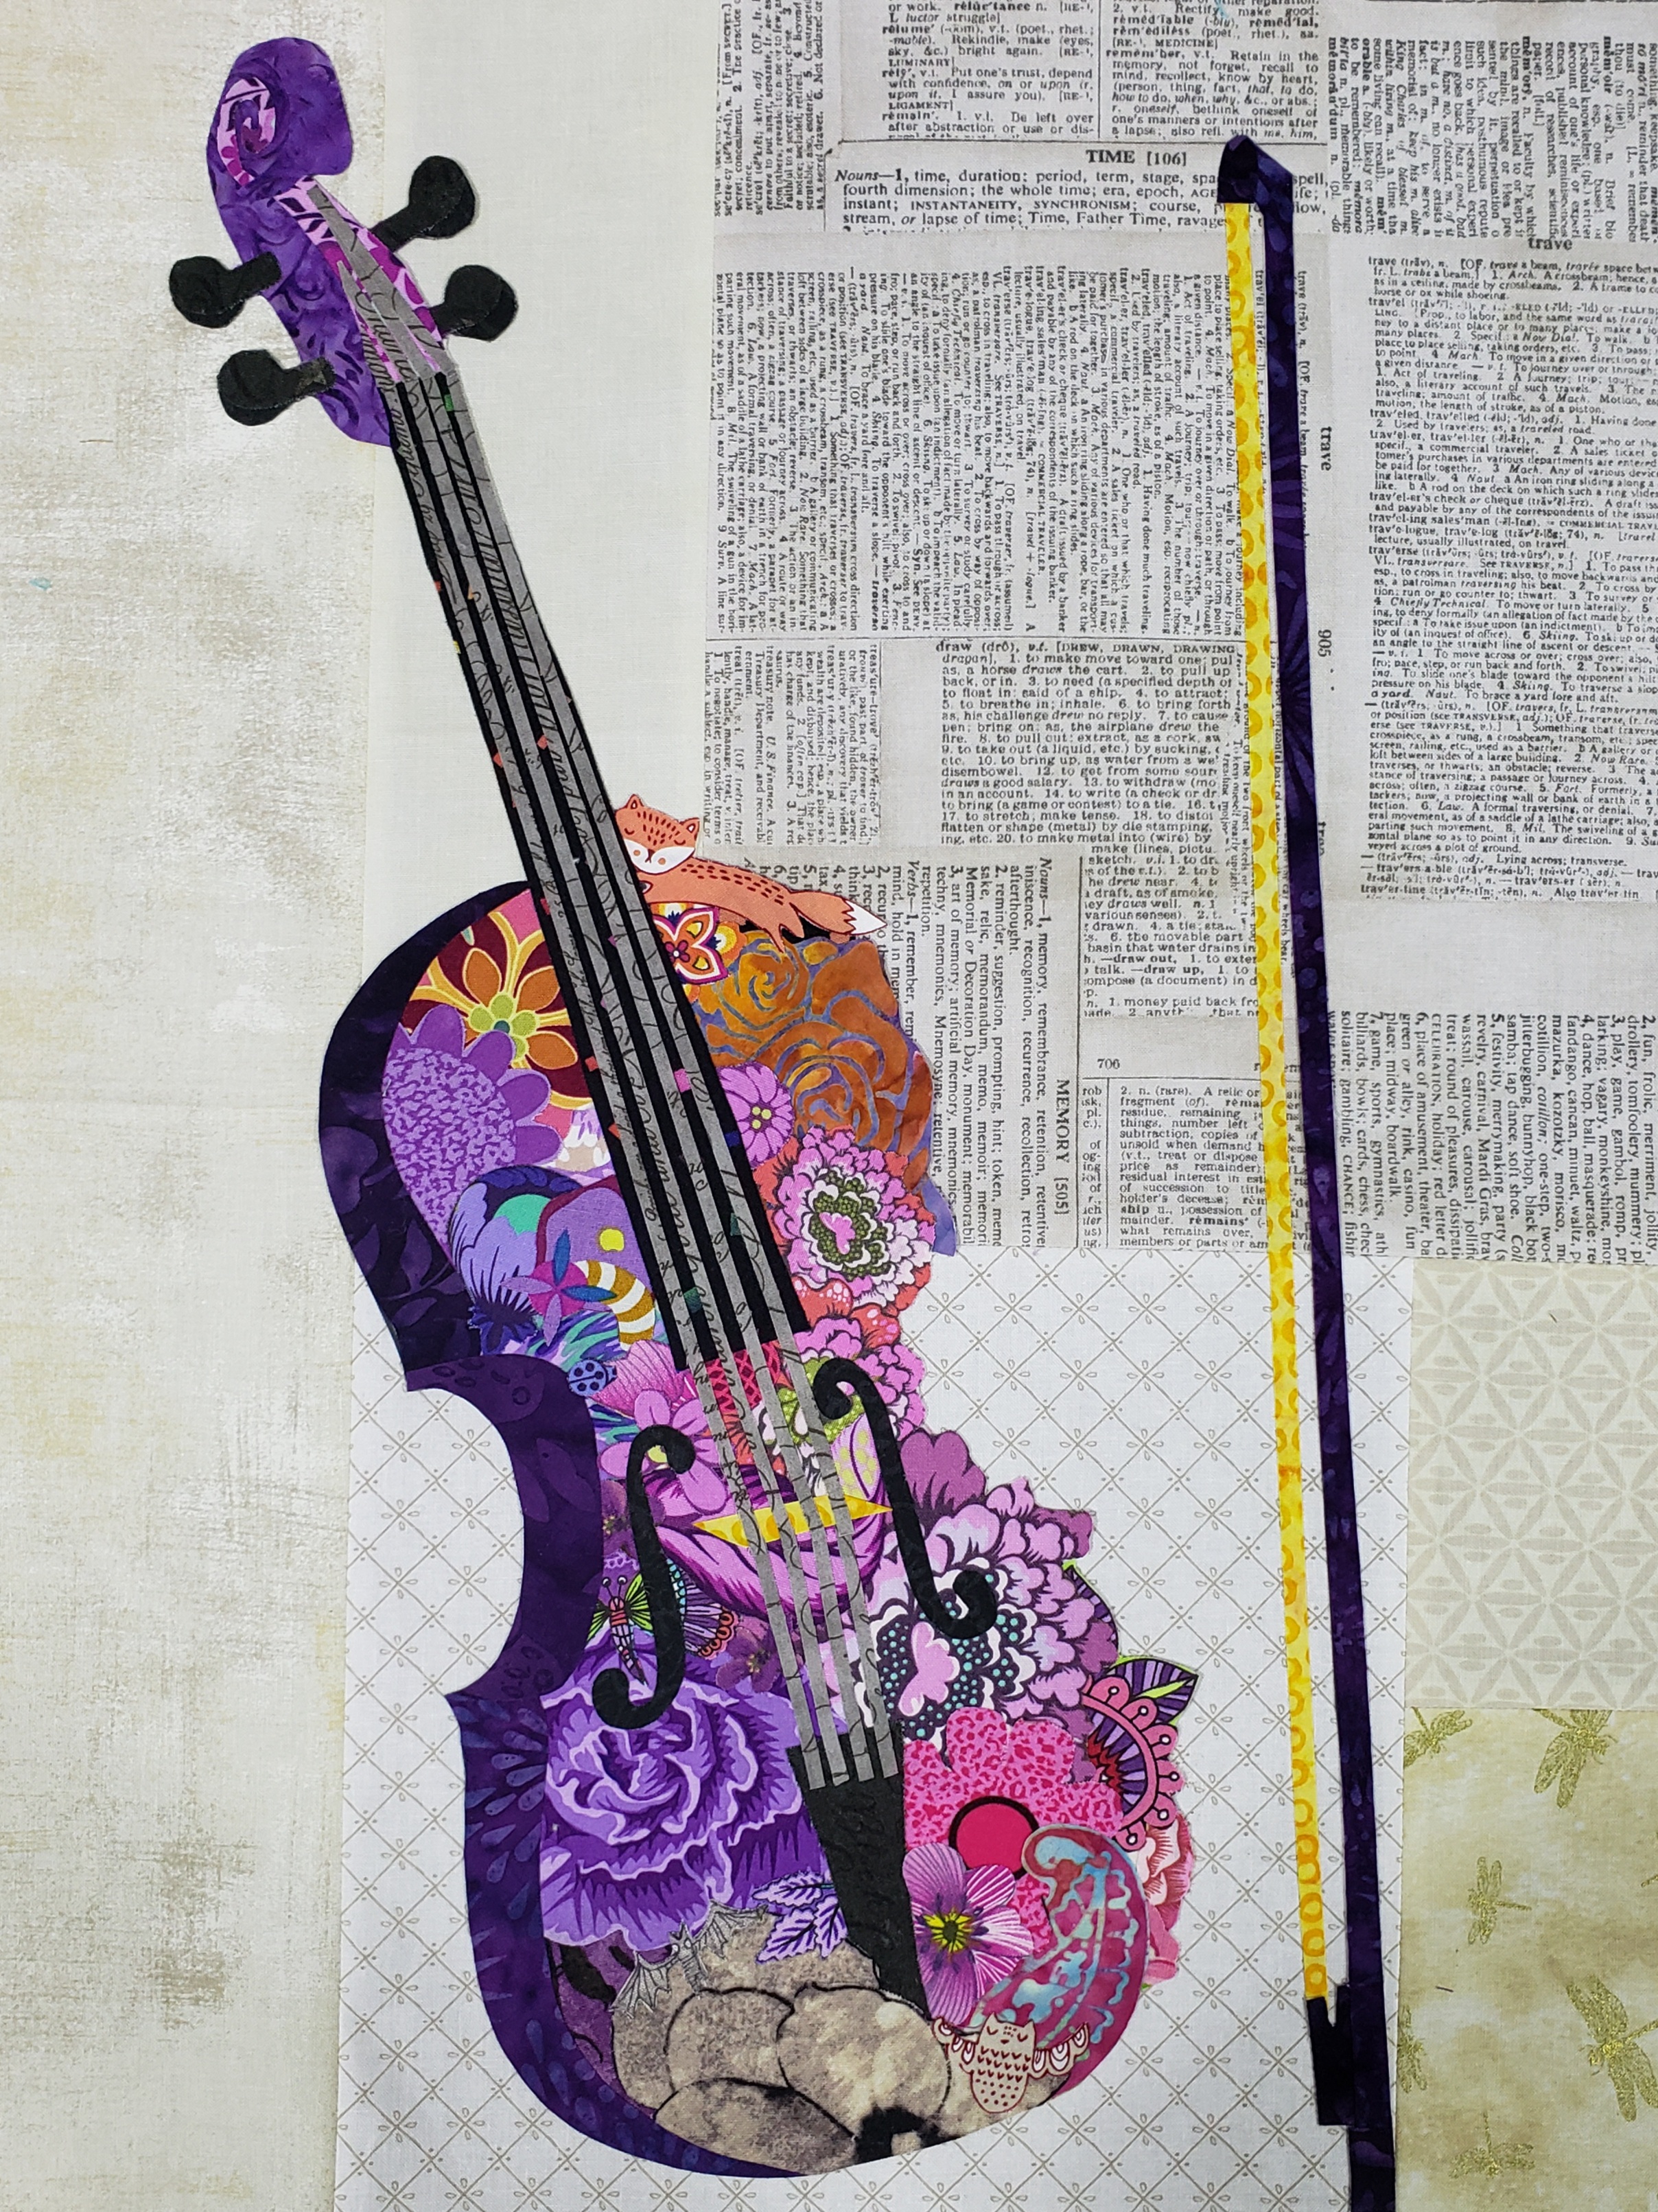
Close for quilting and a little more detail:


I've used this technique a lot!
I have a brief tutorial using a sugar skull HERE if you want to see more collage ideas.


Please check out the bloggers posting with me today:

Thursday, November 17th


You can find the rest of the schedule HERE.

This blog hop is for everyone!
Have fun visiting each blog and making new friends.

They have worked hard to show us some new ideas, so be sure to thank them with 
a sweet comment!

You can check out the
Pinterest Board
to stay up to date, too.

We are making sweet stitching music together!
#MusicBlogHop


Happy melodies to you!


Sunday, September 19, 2021

Welcome Fall - I'm Falling For You Blog Hop

  Welcome to the first day of the

I'm Falling For You
Blog Hop!

I'm happy to kick things off with
Welcome Fall


Joan at MooseStash Quilting presented bloggers with the challenge to make something for 
fall or fall-inspired.
Thank you, Joan, for inviting me to join this super fun blog hop!


Welcome Fall is a wall hanging that I designed with raw edge applique for my front door
and
is the perfect addition to my fall decor.
The leaves will be falling soon and I thought it would be fun to incorporate a basket of leaves.
I added dimension with leaves around the binding too.


My favorite product for raw edge applique is from Thermoweb.
It's HeatnBond EZ Print Lite iron-on adhesive so you can skip tracing by just printing the templates right on the paper side of the fabric adhesive.

Get inspired by all the blogs posting for Fall this week:

Monday, September 20


Tuesday, September 21


Wednesday, September 22


 Thursday, September 23


 Friday, September 24


It's so fun to get inspiration from Blog Hops.
I'm sure we will have way too many ideas swimming in our heads by the end of the week.


See you next month when Carol at Just Let Me Quilt hosts the 
Ghastly Ghouls blog hop!


Official sign-ups for the November Blog Hop will start soon 
(after the I'm Falling for You hop is over).


Stay tuned for the announcement here at 
Creatin' in the Sticks.

Happy Fall!


Thursday, October 29, 2020

Framed - Island Batik Ambassador October Challenge

 The October Challenge for the Island Batik Ambassadors is

Thread Painting with Aurifl
and
today I am excited to share
Framed.


As Island Batik Ambassadors,
we received Aurifil 50 weight cotton thread in our second ambassador box
to use in this month's challenge.


My decision on what to use was made easy because the threads I received matched
the fabrics from the Island Batik Spring 2020 collection,
William's Garden, designed by Kathy Engle.


These fabrics should be in your favorite local quilt shop now
and the 50 weight Aurifil threads are (left to right)
#2021, #2545, #2692, #1148, and #2890.


The blocks are Hawaiian applique designs from Electric Quilt 7
that I printed and cut out with HeatnBond EZ Print Lite. (no tracing!)


Next, I framed the blocks with Island Batik Foundations Solid in White
and "painted" thread "frames" with black (#2692) Aurifl thread.


Once the frames were finished, I stitched them together and added a pieced border.
The top was spray basted and pinned with Hobbs Premium Heirloom Wool batting in the middle
I chose wool batting to show off the stitching of the frames a bit more
and
the quilting went super smooth with a


I stitched the frames one more time and free motion quilted all the blocks with my Aurifil threads


This direct sunlight picture really shows the quilting.


Framed is a 24" x 24" wall hanging and takes me back to vacation time
 and visiting quilt shops in Hawaii.


This month's Ambassador challenge was a lot of fun.
I always enjoy creatin' with thread and Aurifil makes it easy with all the colors and weights.


Check out the 
2020 Island Batik Ambassadors
HERE.

Sunday, December 29, 2019

3D - Float Your Hills and Valleys

The December Challenge for the Island Batik Ambassadors is
3D
and

today I'm excited to share
Float Your Hills and Valleys.


As an Island Batik Ambassador for 2019
every month there is an ambassador challenge.

December's 3D Challenge is all about using
optical illusions,
textures, trapunto, or whatever else makes
a quilt pop into life.


For this month's project, I started with a block pattern
I had designed for the
A Time For All Seasons Block of the Month
I added another column to make the block
12" x 12" finished.


Next, I picked Island Batik fabrics for the 3D effect.

The dark green (BE31-G1) and dark blue (BE21-D2) are batik foundations in the blender collection and the grey and white fabrics are in the solid batik collection.
The light blue in called Bluebird and is in the Freedom collection by Kathy Engle.  
The light green (111932612) is from the Petal Pushers collection also by Kathy Engle.


I cut the pieces for the blocks with the Accuquilt GO! Half Square Triangle-2" Finished square (55712)  from the Accuquilt Go! Qube Mix and Match 8" Block

This is my favorite way to make half-square triangles
and
the accuracy is amazing.
Then I chain pieced all those half-square triangles with
Aurifil 50 wt thread in white.


I designed the quilt in Electric Quilt with 3 of the Wavy Stripes blocks 


I quilted the background of Float Your Hills and Valleys on my Handiquilter with
 Glide thread in white.  
The blocks were quilted with straight lines following the wavy stripes with 
Aurifil 50 wt variegated #4670
The binding is Island Batik foundation blender fabric (BE21-D2).


I love the way this quilt looks against the white wall in the bedroom 
and 
that is where it will stay.


You can find the full list of Island Batik ambassadors posting for the 
3D Challenge
by clicking HERE.


This is my last post as an Island Batik Ambassador for 2019.
It's been a super fun year and I want to thank 
Island Batik and the industry partners, Aurifil Thread, Accuquilt, and Hobbs Batting,
 for the great products and super fun challenges.
The experience has been priceless!


Wednesday, July 31, 2019

July - An Island Batik Month

I had so much fun this month as an
Island Batik Ambassador.

I wanted to do a recap of the month
because the projects are some of my favorite to date.


The beginning of July brought the


Island Batik was super generous and provided the fabrics
from the new
Freedom fabrics collection designed by Kathy Engle
for my


I've always wanted to participate in the 
and this was the month I finally did it.
That post can be found by clicking HERE.

One of the biggest challenges for July was a video challenge for Island Batik.
We receive 2 boxes a year and this was box number two.


Mid-July I was super excited to join other
talented Thermoweb designers
 for the
Summer Fun Sew Along.

I combined my Thermoweb designer gig with my Island Batik Ambassador gig
and
had so much fun 
 designing a quilt block inspired by so many childhood memories.


Later I made the Summer Fun Kitchen Towels with the sew along quilt blocks.


The post with all the pattern information is HERE and the towel post is HERE.

I saved my favorite July project for last:
The July Challenge for the Island Batik Ambassadors was
Artsy Fartsy.

I went out to our pond and spent time just looking around and taking pictures.


That was my inspiration for


The real challenge was to make him look half in and out of the water of the pond.


Check out the fun pictures of my frog process HERE.

He was so fun to create and I didn't want him to get lost in the shuffle of vacations
 and 
crazy busy summer fun.

Bring on August!!